T111 Siding Nailing Pattern - Continue to the opposite end of the wall. Every 6” on the sides and every 12” on the studs located in between, the edges at the sill and top plate should be nailed every 4” to seal tight against insects and air. Nail length should be compatible with the nail gun’s specifications. Establish where the siding will attach to the shed walls Web here is more progress around the corner. Use a level to ensure panels are plumb and adjust before you secure them. The side with the top shiplap should be along the edge of the wall. • although not recommended, where 24 in. • framing must not exceed 16 in. Space the nails 4 inches apart on the top and bottom plates of the wall and 6 inches apart along the vertical studs.

26 Pictures Installing T1 11 Siding Get in The Trailer
Establish where the siding will attach to the shed walls Space the nails 4 inches apart on the top and bottom plates of the wall.
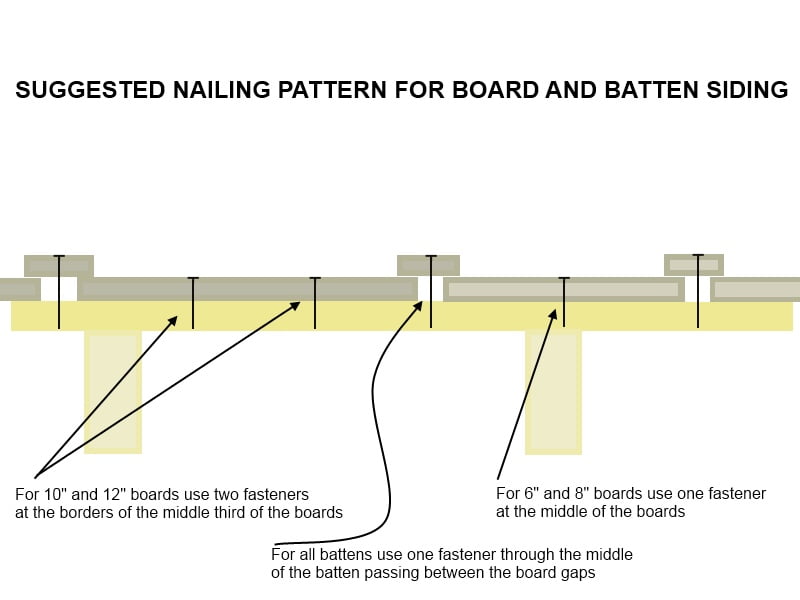
Board and Batten Siding Install
Use nails with a diameter of approximately 0.113 inches, which is a common size for siding nails. By adhering to the recommended nailing pattern, securing.

How To Install T111 Siding YouTube
Apply steady, even pressure on the nail gun and pull the trigger to drive the nail into the siding. Continue to the opposite end of.

How to Install T111 or LP SmartSide Siding on a Shed (T111 or LP
Taunton university of knowledge fhb campus at breaktime. If in a seismic zone, you'd have to meet shear waall requirements, i believe theree is a.
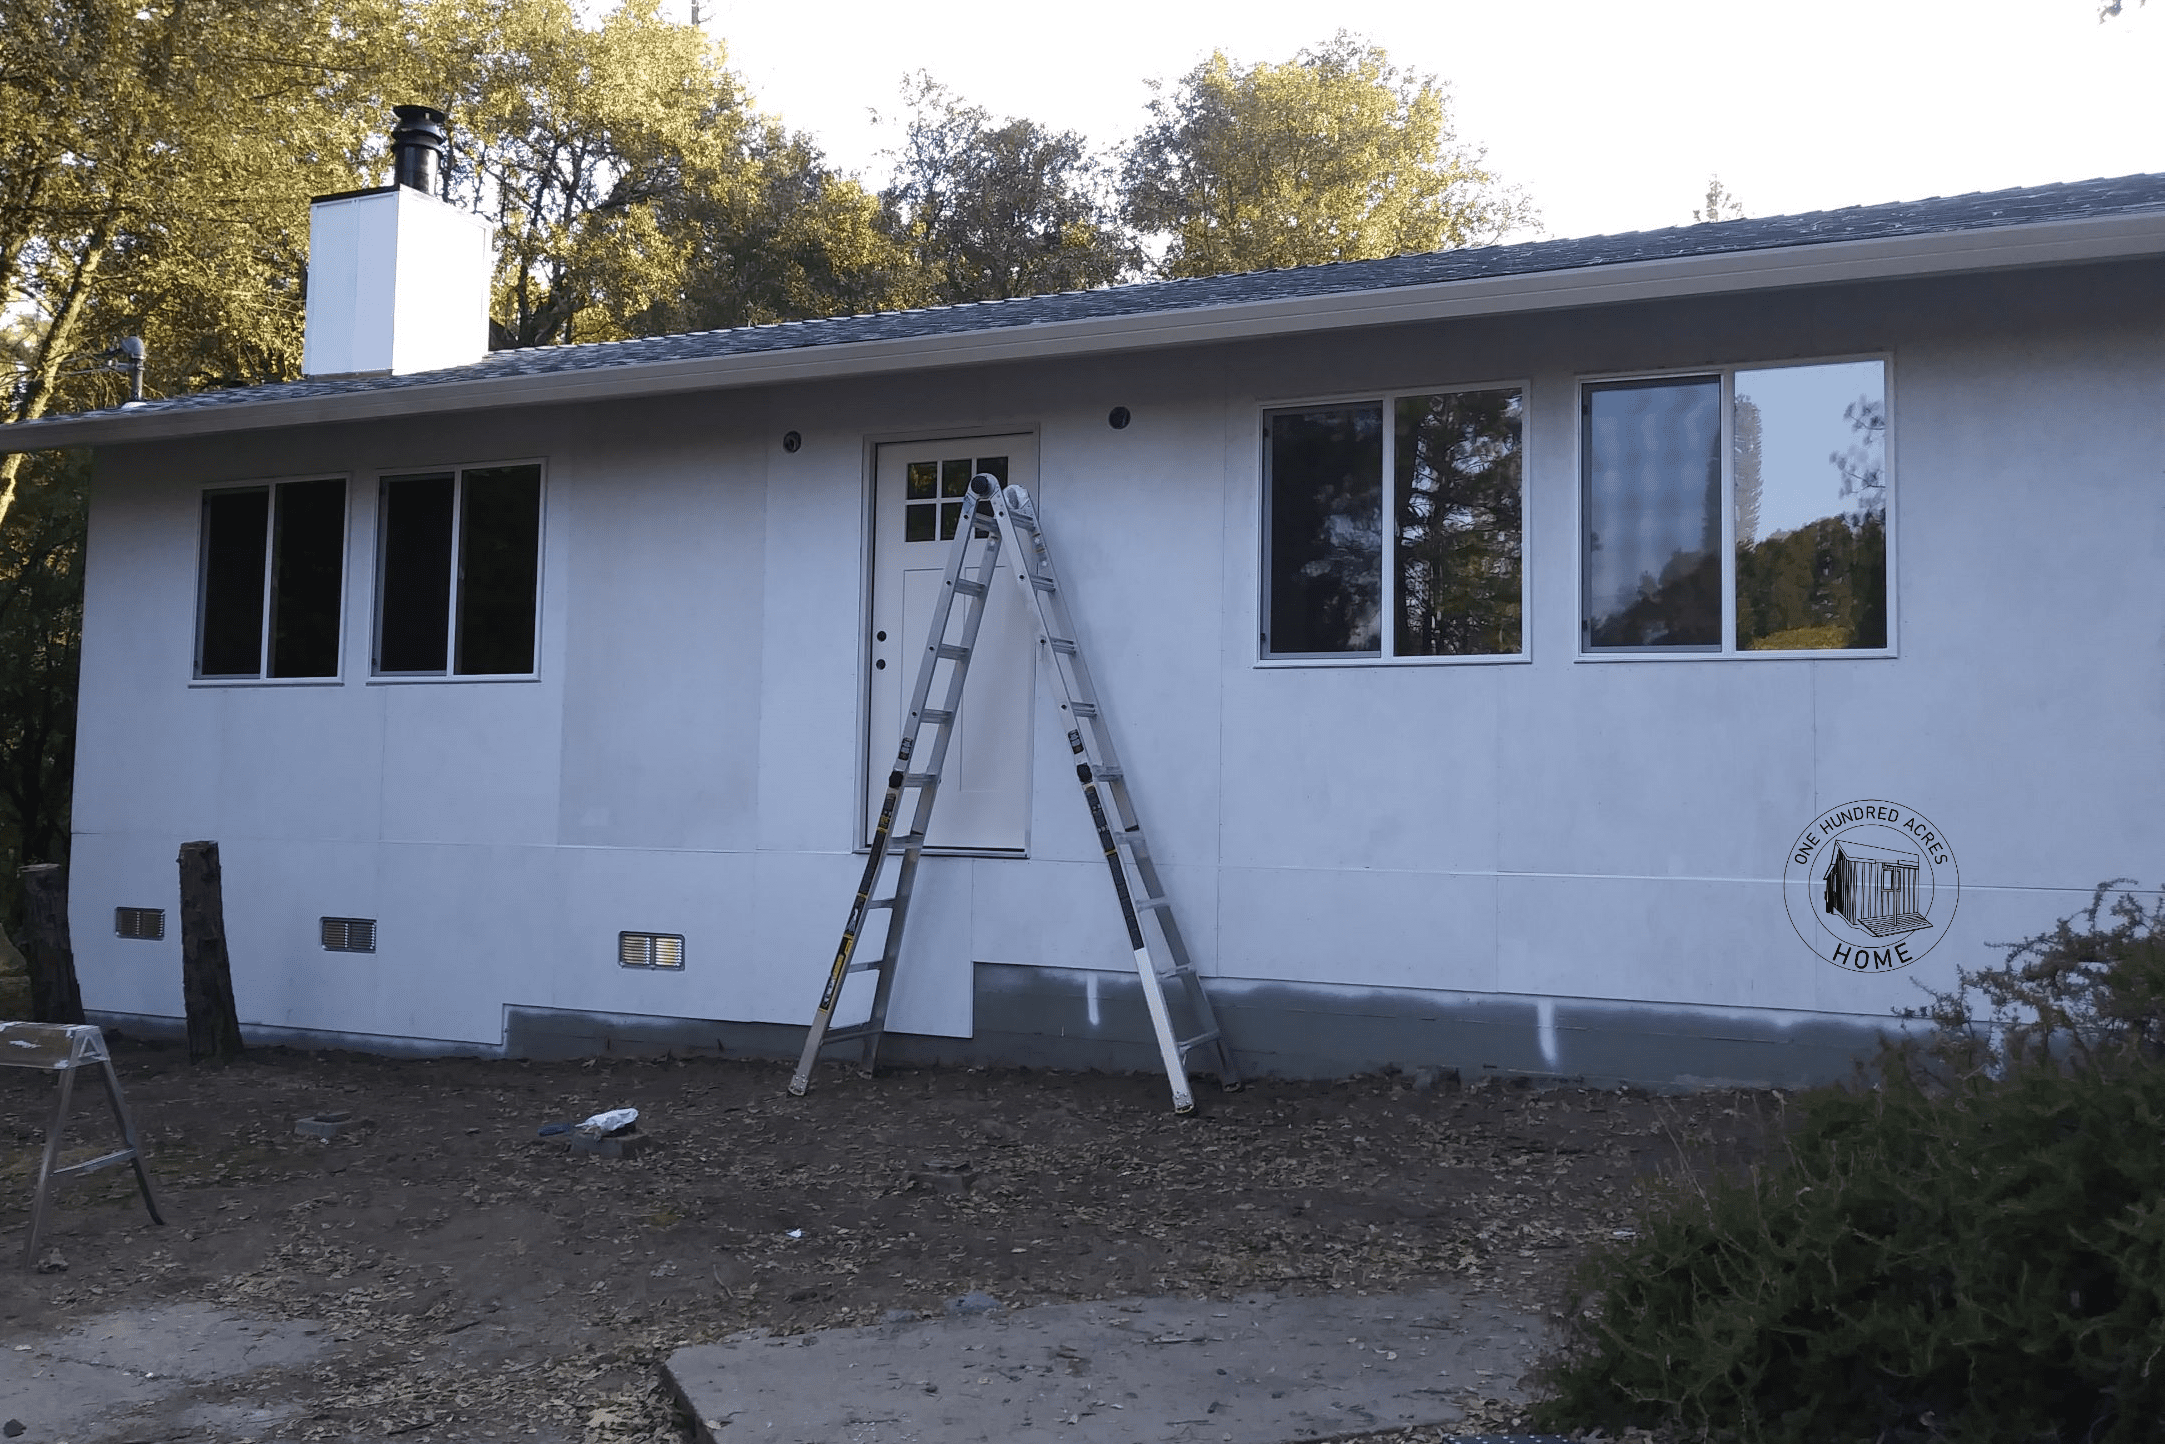
How to DIY Install T111 Plywood Siding One Hundred Acres Home
These nails should be long enough to penetrate the siding, plywood sheathing, and securely fasten into the wall studs or framing behind the siding. •.

How to Install T111 or LP SmartSide Siding on a Shed (T111 or LP
By adhering to the recommended nailing pattern, securing the. • follow product specific nailing pattern (see fig. Web • apply these lap siding products horizontally.

Warped T111 siding, can this be nailed back in? Home Improvement
• framing must not exceed 16 in. Use nails with a diameter of approximately 0.113 inches, which is a common size for siding nails. Ensure.

Top 10 Best Nails For T1 11 Siding Reviews With Scores VarietyPick
Web here is more progress around the corner. Every 6” on the sides and every 12” on the studs located in between, the edges at.

How to Install Shed Siding (T111 and LP SmartSide Panel Installation
Nail length should be compatible with the nail gun’s specifications. Use a level to ensure panels are plumb and adjust before you secure them. Ensure.

Shed Door Plans StepByStep Construct101
Web • apply these lap siding products horizontally on walls and gables that meet racking requirements. If it didn;t, it wouldn't be used on so.
Use Galvanized Or Stainless Steel Nails To Prevent Corrosion, Which Is Essential For Outdoor Applications.
Continue to the opposite end of the wall. • follow product specific nailing pattern (see fig. Web here is more progress around the corner. This length allows the nails to penetrate through the siding panel, the sheathing, and at least 1 inch into.
• Follow Product Specific Nailing Pattern (See Fig.
Every 6” on the sides and every 12” on the studs located in between, the edges at the sill and top plate should be nailed every 4” to seal tight against insects and air. Web spraying works best, followed with a brush while the sprayed paint is still wet. Space the nails 4 inches apart on the top and bottom plates of the wall and 6 inches apart along the vertical studs. Vertical framing is used, nail to framing 24 in.
• Framing Must Not Exceed 16 In.
Web • apply these lap siding products horizontally on walls and gables that meet racking requirements. I'm unsure whether it would be easier/better to use ring shank nails in a nail gun, or screws. • framing must not exceed 16 in. This angle helps prevent splitting of the wood fibers.
• Although Not Recommended, Where 24 In.
Nail length should be compatible with the nail gun’s specifications. Start from the bottom, avoiding direct contact with the ground to prevent moisture accumulation. The side with the top shiplap should be along the edge of the wall. Ensure they are properly seated and feed smoothly.