Lunch Bag Snowflake Patterns - Cut from the top opening of the lunch bag to create your snowflake design. 8 paper lunch bags, a glue gun, and glue stick, scissors, and twine to hang them. When using bakery bags (i love the 3 x 10) i recommend 25 bakery bags to make a large, beautiful paper bag snowflake. Web draw on the 3d snowflake pattern as shown. Web place a line of hot glue up the center of one of the stack and glue them together. Then place the next bag directly on top of it, making sure the bags are facing the same way. Web flatten your brown paper bags with the fold facing down. Cut the snowflake pattern with strong scissors. Grab the next paper bag and place it on top of the glue. Make sure they’re all facing the same way, with the bottom of the bag facing up.
DIY Paper Lunch Bag Snowflakes // Sustainable Holiday Decor — Searra
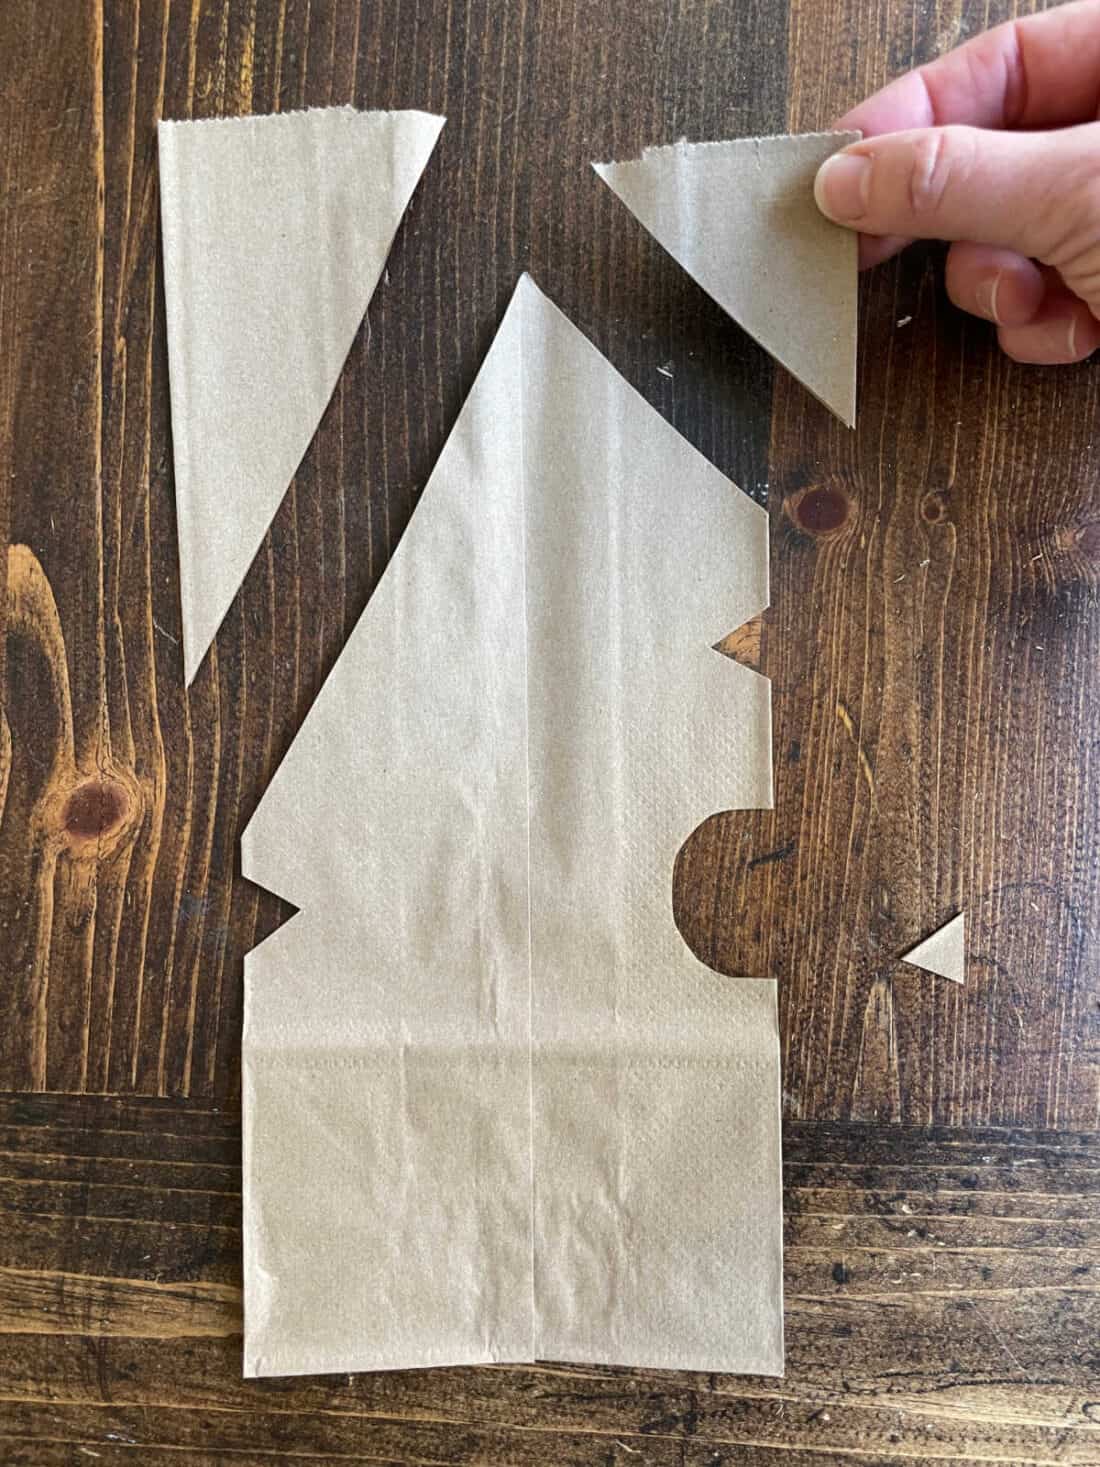
With your scissors, start cutting your snowflake shape from the 4 pressed down bags. Use 8 bags per snowflake. Start with one bag and run.

49++ Paper bag snowflake craft ideas in 2021 This is Edit
Web here’s how to make snowflakes with paper bags. Place the second bag on top of that bag of. Here is one option of how.

Create Stunning 3D Paper Snowflakes with Lunch Bags DIY Craft
Hot glue in a t shape (the top of the t should go across the bottom of the bag). Take the bags and stack them.

How to make 3D paper bag snowflakes using lunch bags Cuckoo4Design
Web lay the second bag on top and repeat the process for the next paper bag as well. You’re going to glue together your bags.

Paper Bag Snowflakes {Video Tutorial} allmomdoes
Cut the snowflake pattern with strong scissors. Start by placing your first paper bag on a table with the flap side down and the opening.

How to Make Brown Paper Bag Snowflakes (Cheap and Easy) The Keele Deal
Start by placing your first paper bag on a table with the flap side down and the opening of the bag facing you. Place the.

Simple Snowflake Paper Bag Craft Hip Homeschool Moms
One thin line at the bottom of the bag and one line going up the center of the bag. Hot glue in a t shape.
DIY Lunch Bag Snowflakes At Home With The Barkers
8 paper lunch bags, a glue gun, and glue stick, scissors, and twine to hang them. Web using good scissors, go ahead and cut out.
Sdcvsdcs Mountain Skiing Or Snowboarding And Snowflakes
Again, copy the first cuts onto the other 4 bags. Place the next bag right on top and repeat until all 8 bags are glued.

How to make large 3d paper bag snowflakes using lunch bags Artofit
You can also round the top or. If the bags you are using have handles, cut them off. Choose the amount of lunch bags you.
The Glue Line Looks Like A T As Shown In The Below Image.
Glue three more individual bags together. Web using good scissors, go ahead and cut out the design you drew on the first bag. The cheapest toilet paper roll snowflakes. You can also round the top or.
Web Lay The Second Bag On Top And Repeat The Process For The Next Paper Bag As Well.
One thin line at the bottom of the bag and one line going up the center of the bag. Take the bags and stack them with the flap up and facing you. Start by placing your first paper bag on a table with the flap side down and the opening of the bag facing you. Here is one option of how you can cut the pattern.
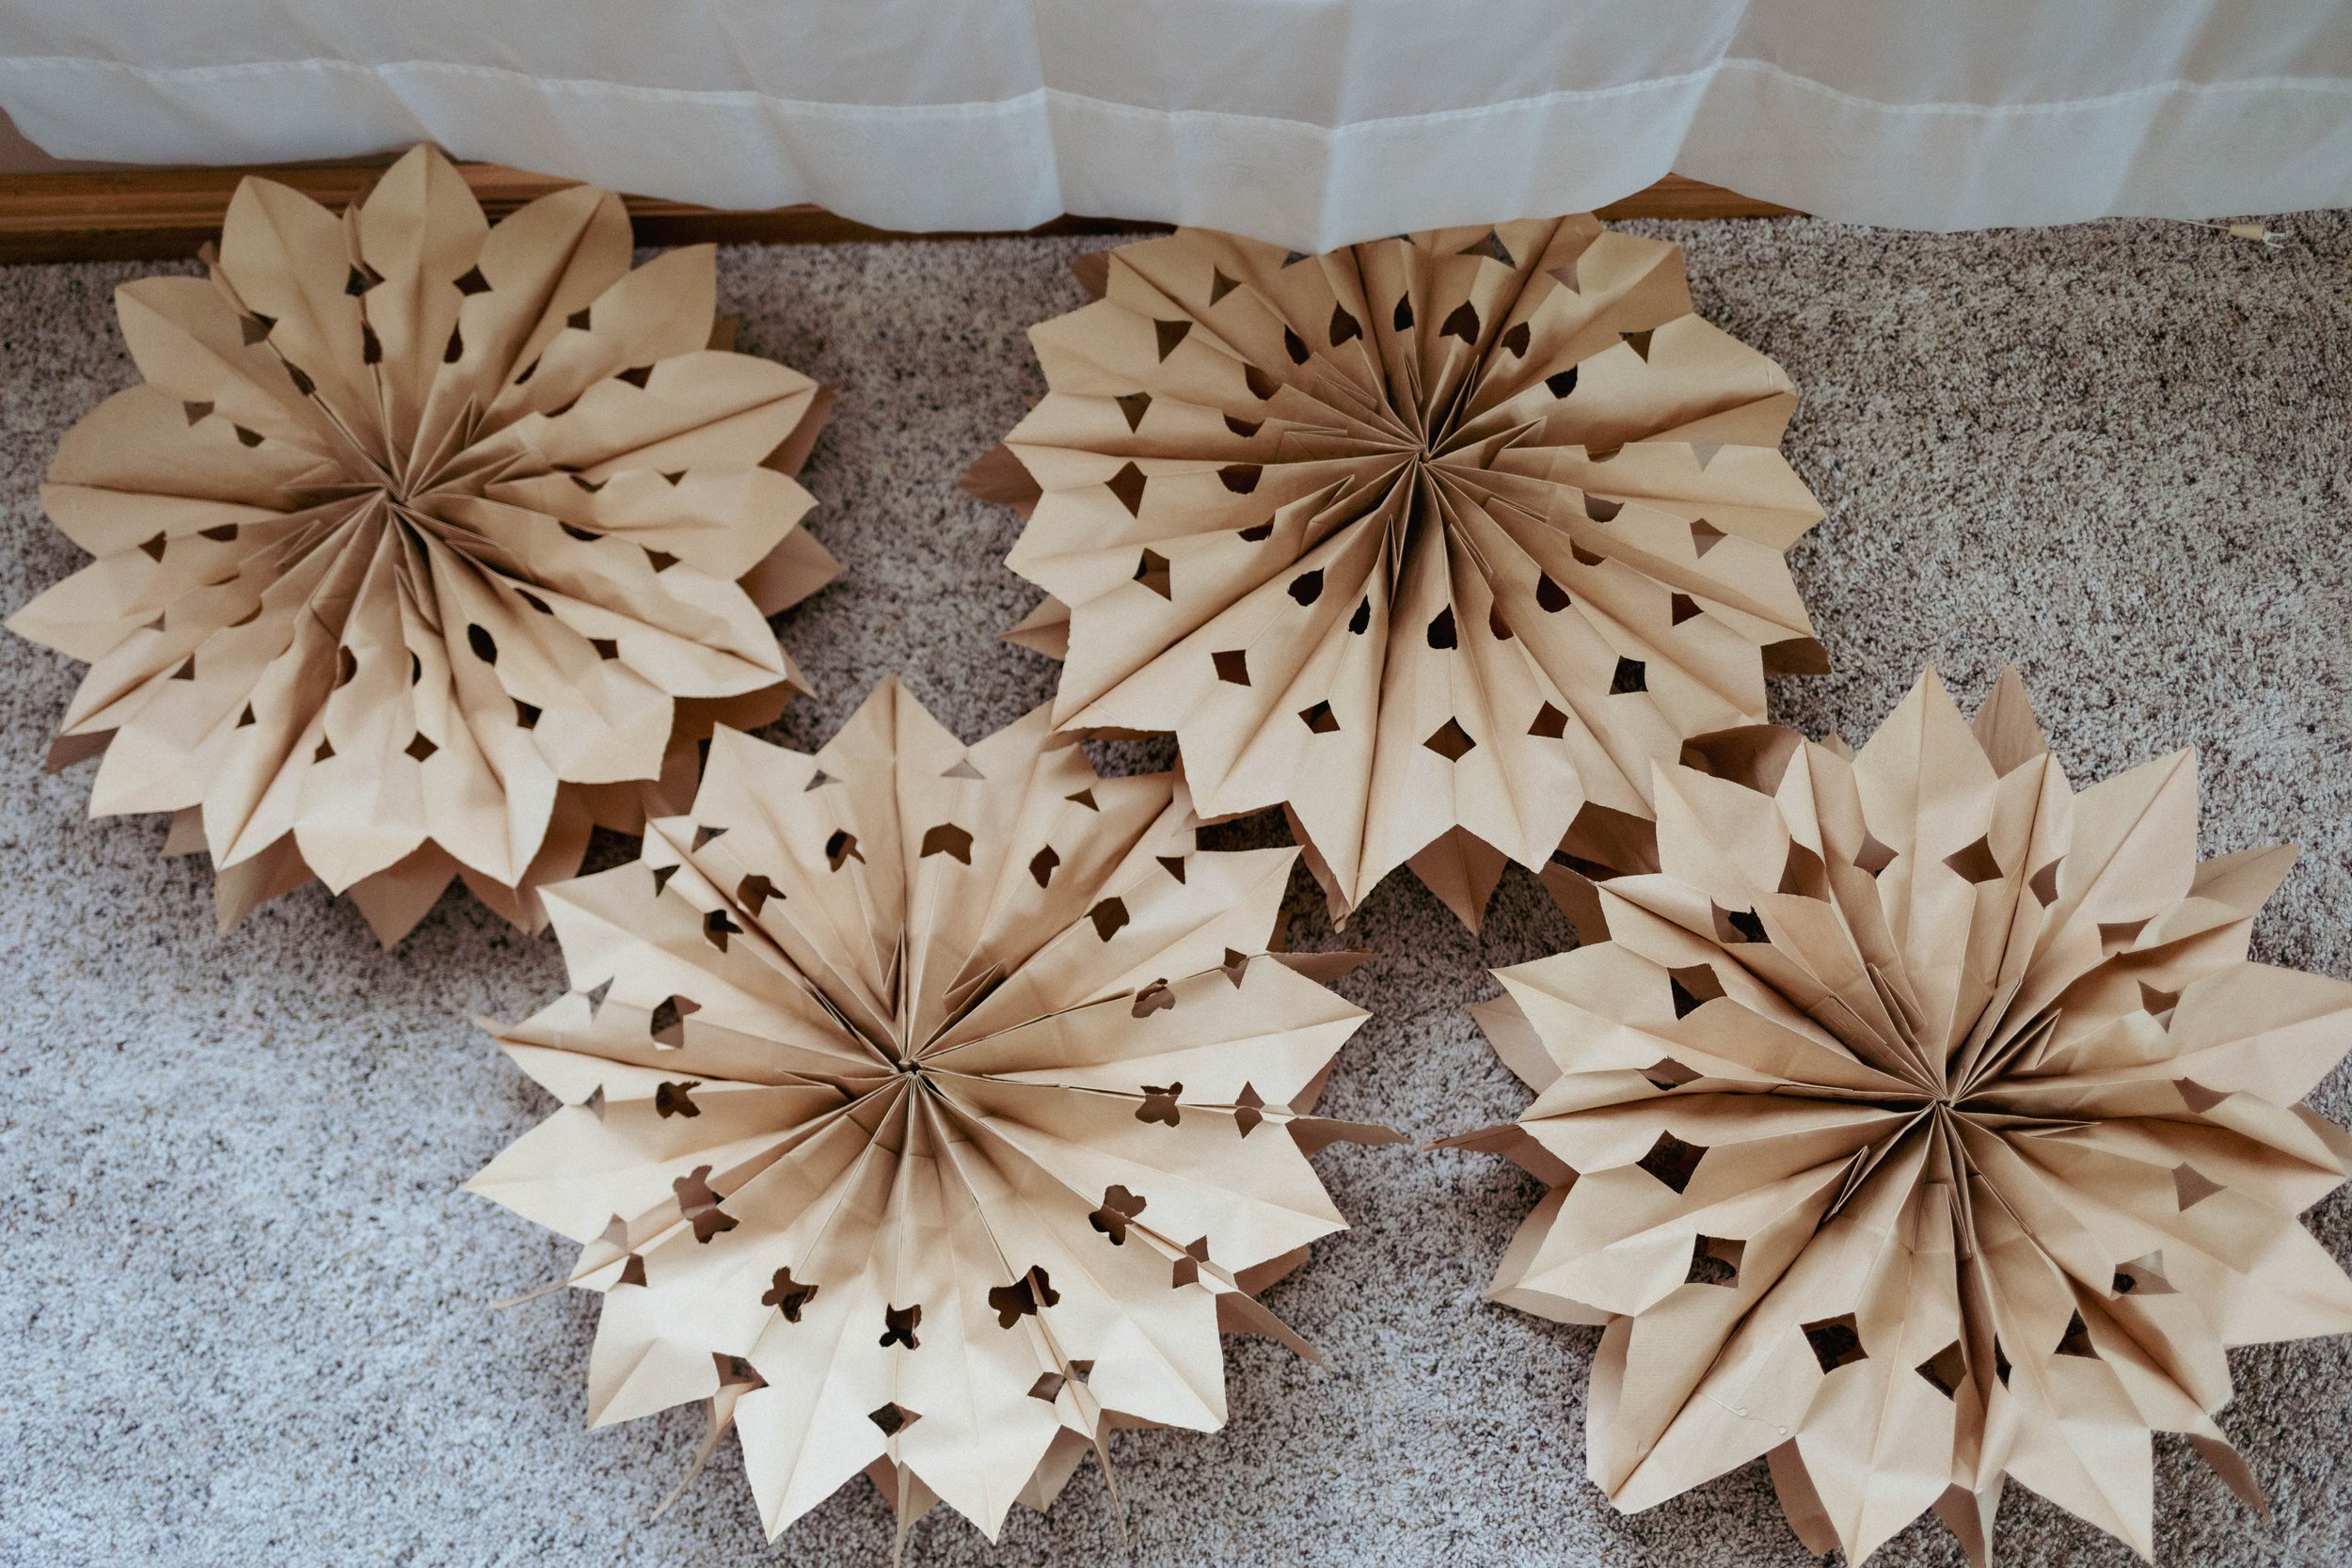
Web Find Out How Easy And Fast You Can Make Paper Bag Snowflakes Using Cheap Brown Lunch Bags From The Grocery Store.
Hot glue in a t shape (the top of the t should go across the bottom of the bag). When using bakery bags (i love the 3 x 10) i recommend 25 bakery bags to make a large, beautiful paper bag snowflake. Repeat step 2 until all of your bags are on top of each other being sure to add the glue “t” to each one. Web flatten your brown paper bags with the fold facing down.
Use 8 Bags Per Snowflake.
You can use hot glue or regular elmer’s glue for this. Cardboard gingerbread snowflake and other gingerbread shapes. Web check out our lunch bag snowflakes selection for the very best in unique or custom, handmade pieces from our lunch bags & boxes shops. Make a line of hot glue down the center of your first bag and then a line across the bottom (forming a “t”).