Corner Bookmark Pattern - Web cut out your corner bookmark. Run your fingernail along the crease to make it nice and sharp. Fold paper in half diagonally to make a triangle, then unfold it. Glue the top flap to the bottom flap to create the pocket. These bookmarks are so pretty and practical yet easy to make. Web bee embroidered corner bookmark pdf pattern $ 8.00. Fold the paper in half diagonally the other way, and unfold it again. After turning, use the bone folder to poke your corners out to make sure they are crisp. Press with a warm iron. You will see a white square form inside your triangle.
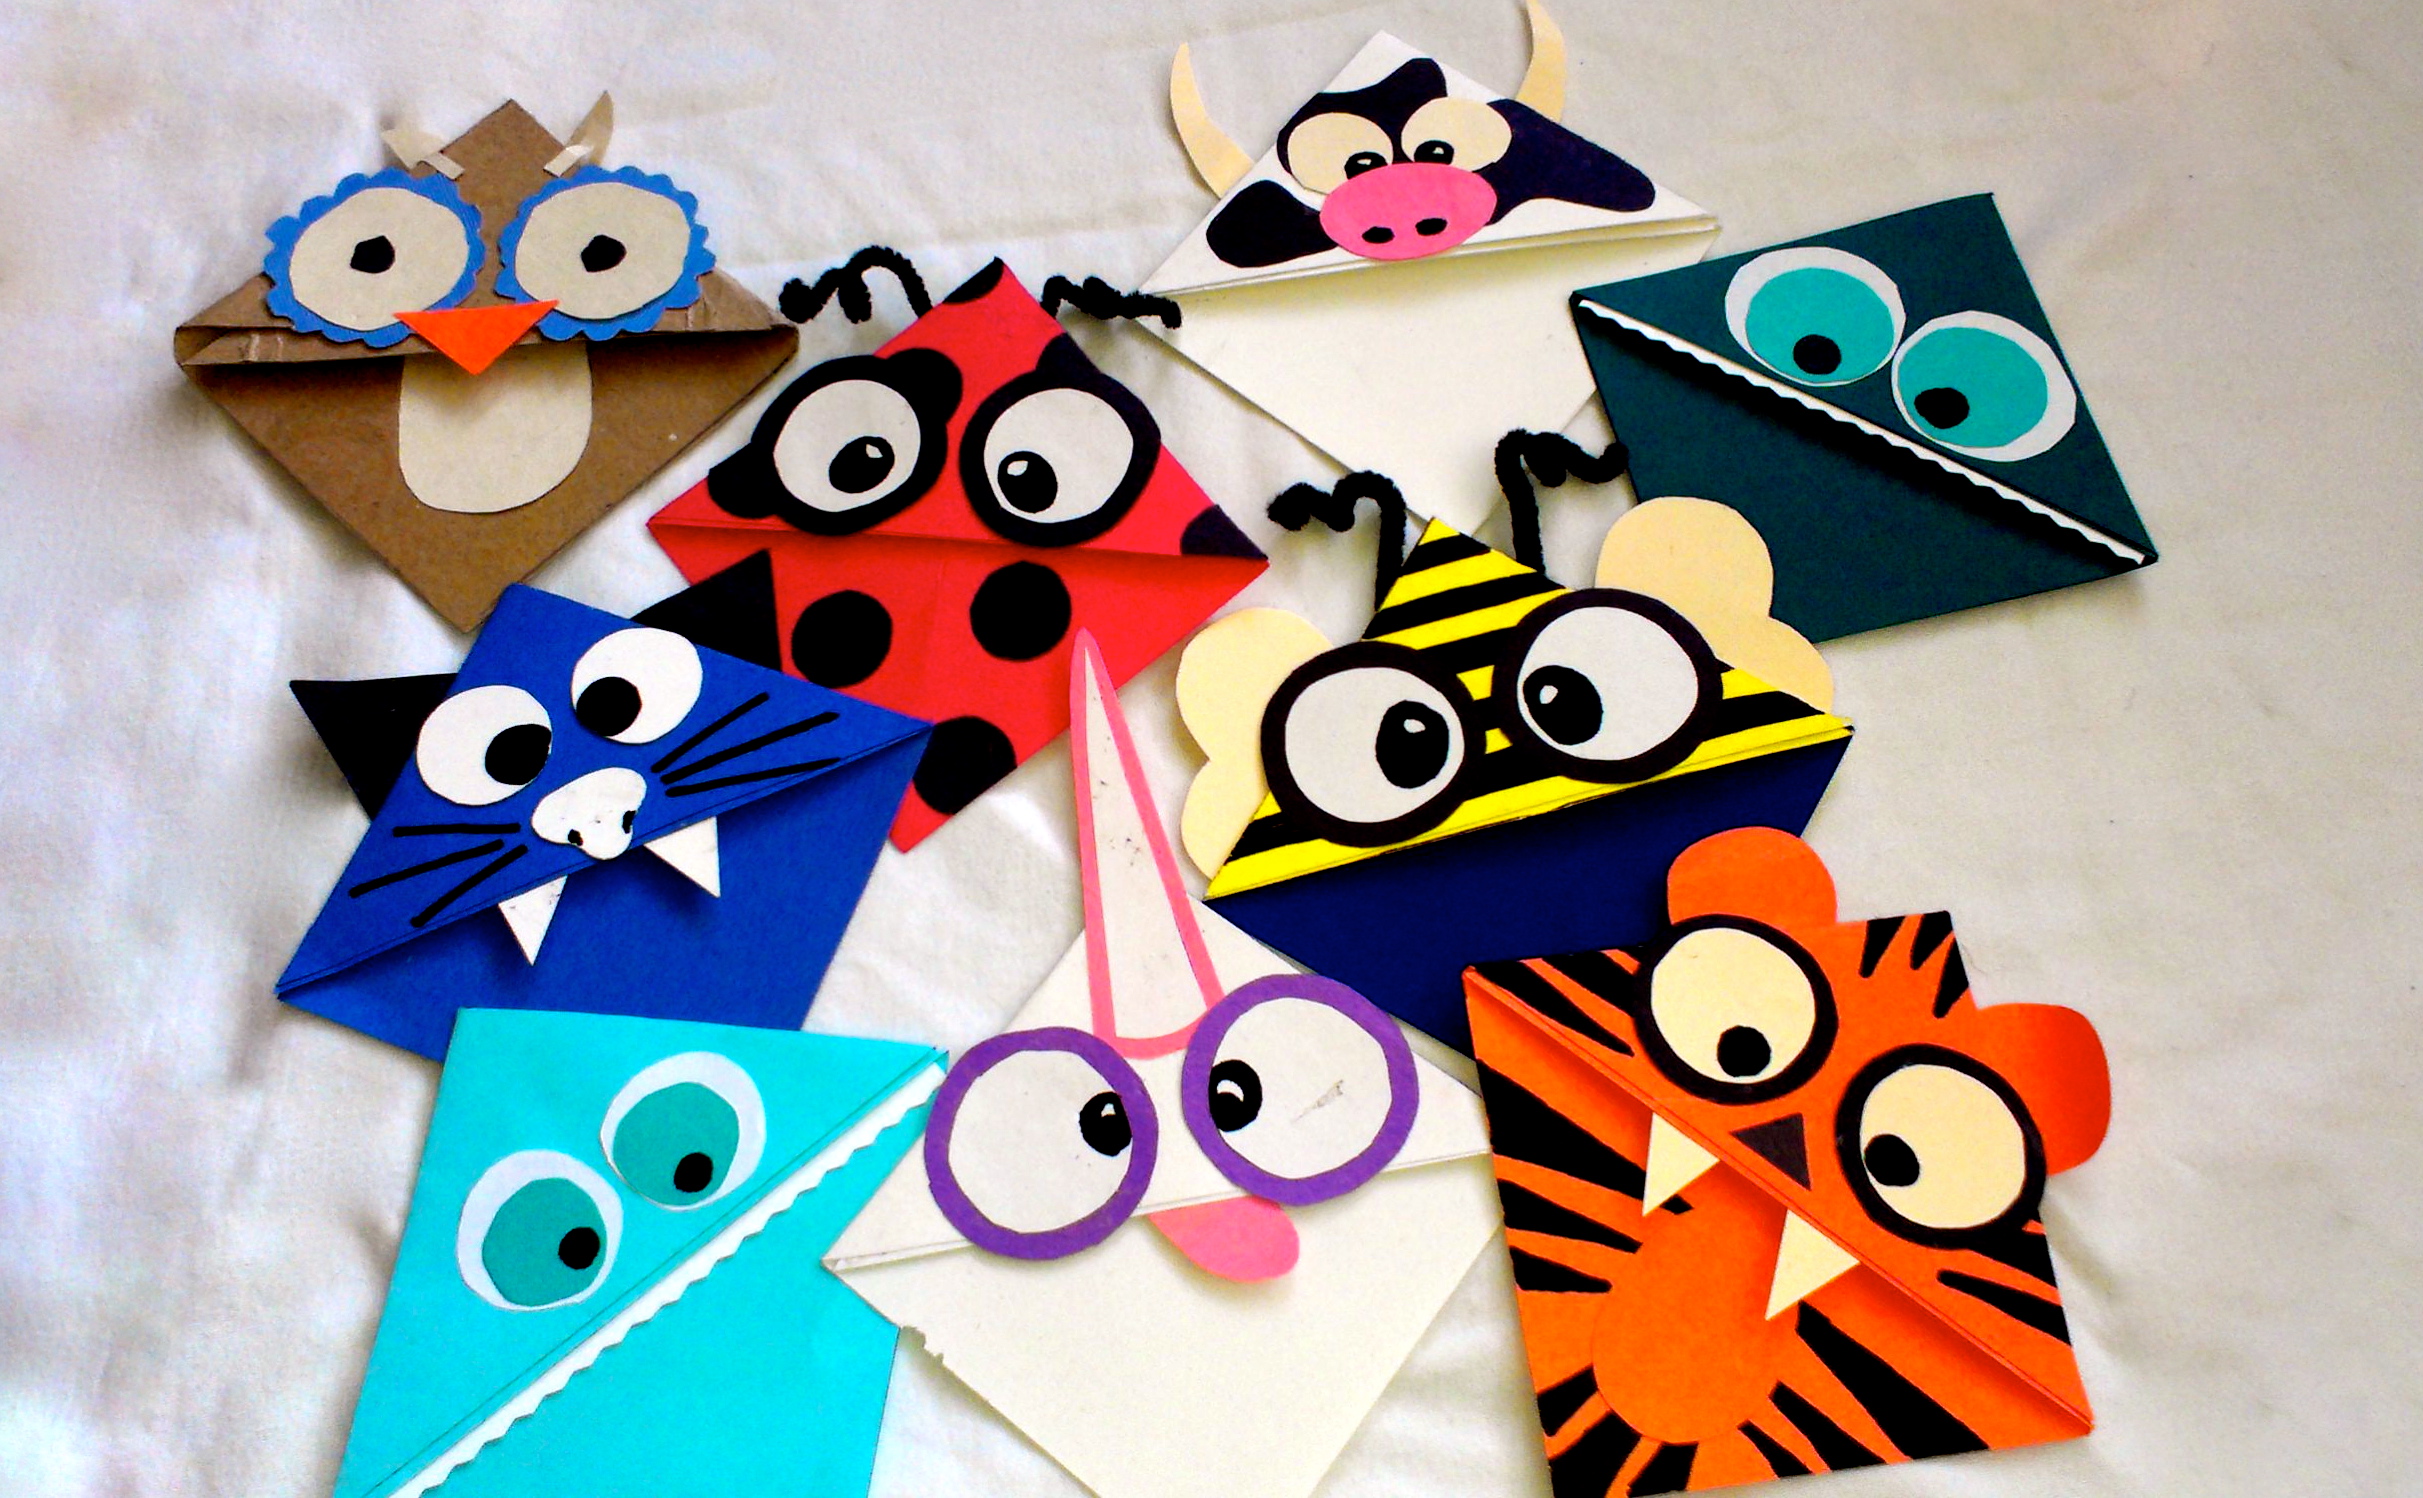
30 Best DIY Bookmark Ideas for Crafty Bookworms
Press and then pin the gap. Take the bottom left corner, and fold it towards the top right corner. Use a paper scoring tool or.

Fabric Corner Bookmarks Craft Buds
Web sew around the perimeter with a 1/4″ seam allowance leaving a 2″ opening at the bottom. Place the third fabric piece with the right.

How To Make Corner Bookmarks AppleGreen Cottage Corner bookmarks
Slip the bookmark over the corner of the pages you want to mark. Web sew the squares, leaving a 1/2″ to 1″ space to turn.

Geometrical corner bookmarks tutorial and pattern Keeping it Real
You can also use a chopstick, scissors or a butter knife. Stitch around the outer edge with a 1/4 seam allowance, leaving 1. Hot glue.

Fabric Corner Bookmark Printable Tutorial — Crafty Staci
Make sure the folds are super crisp. Stitch around the outer edge with a 1/4 seam allowance, leaving 1. 1 piece of interfacing measuring 3.

How To Make Corner Bookmarks AppleGreen Cottage Corner bookmarks
After turning, use the bone folder to poke your corners out to make sure they are crisp. Press with a warm iron. My bookmark pattern.
Adorable Customized Corner Bookmarks 4 Easy Steps Craft projects for
Line up all the raw edges and pin or clip in place. Web cut out your corner bookmark. Take the bottom left corner, and fold.
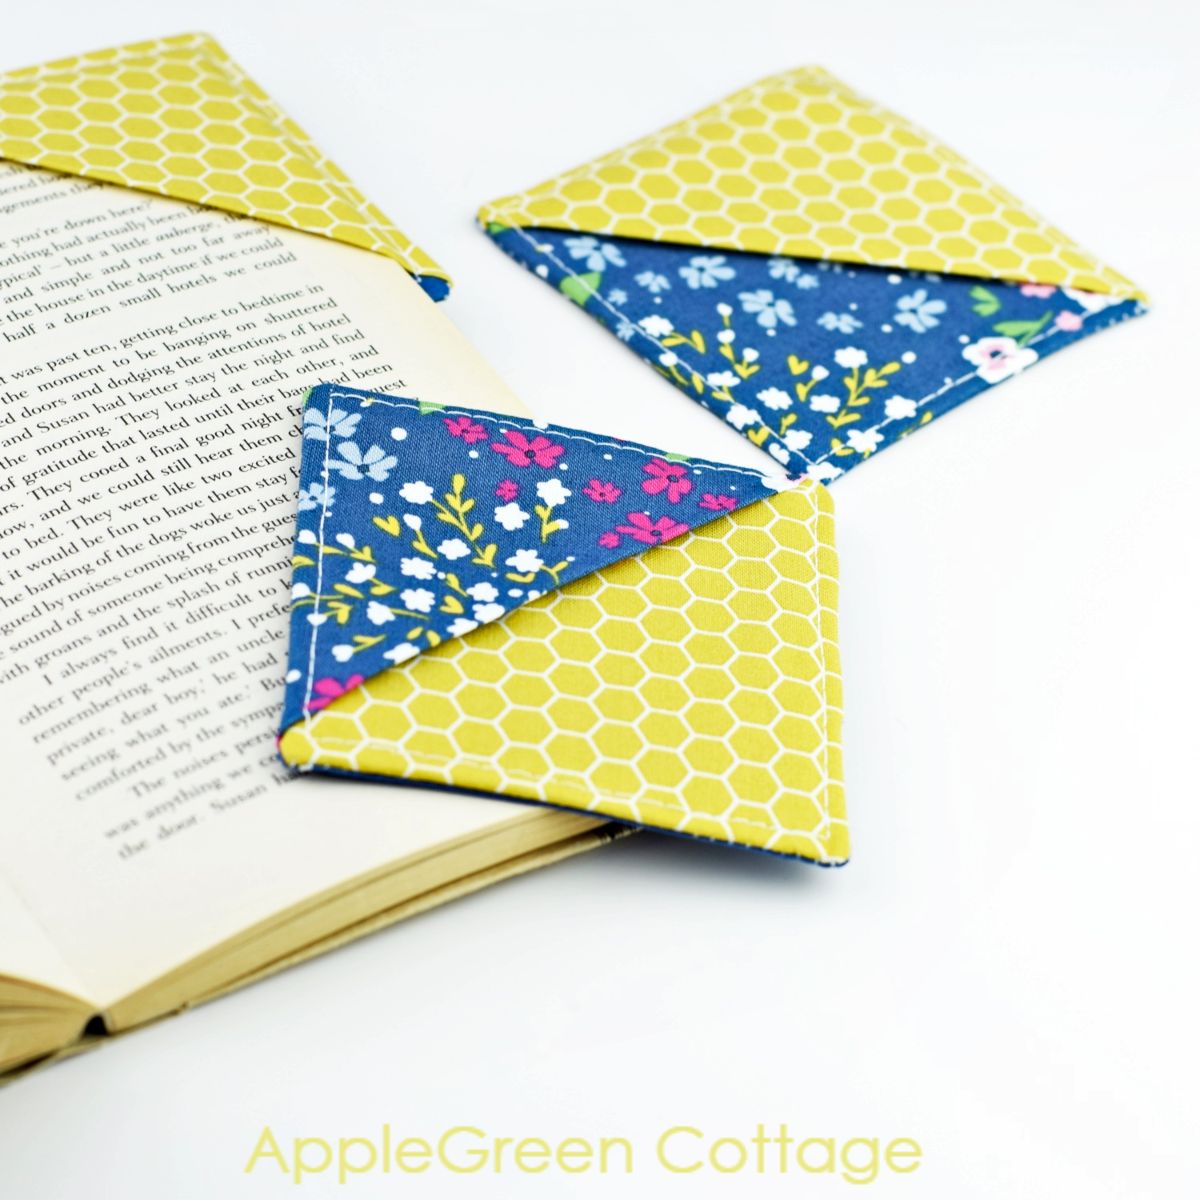
How To Make Corner Bookmarks AppleGreen Cottage
Backstitch at both openings to ensure it stays in place. Use a turning tool or chopstick to gently press out the corners. Fold paper in.

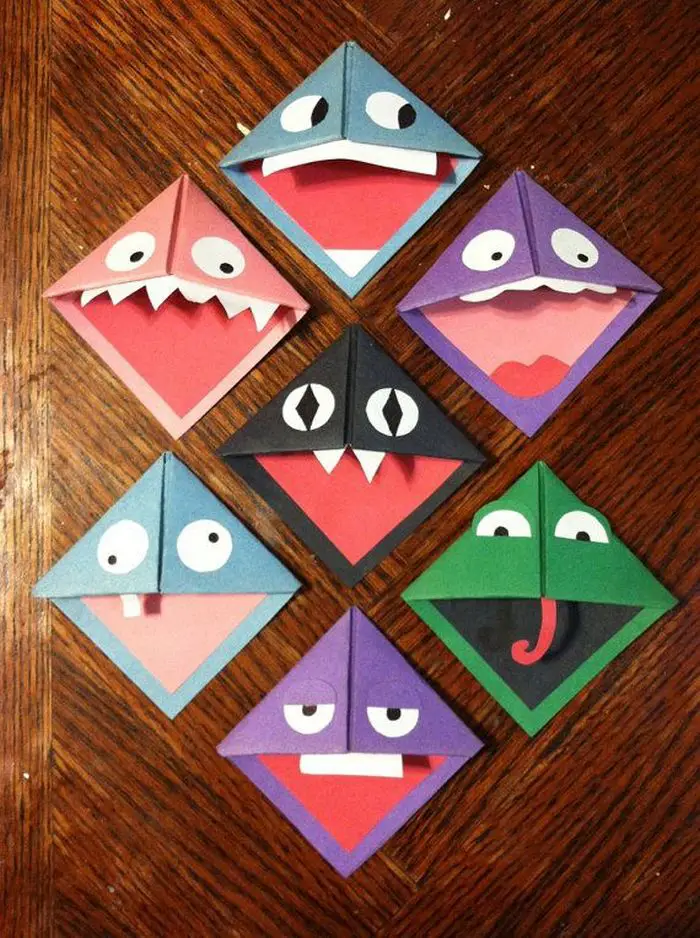
How to Fold an Origami Corner Bookmark Creative Ramblings
You will see a white square form inside your triangle. Cut two 4”x4” squares from your first (main) fabric and one 4”x4” square in the.
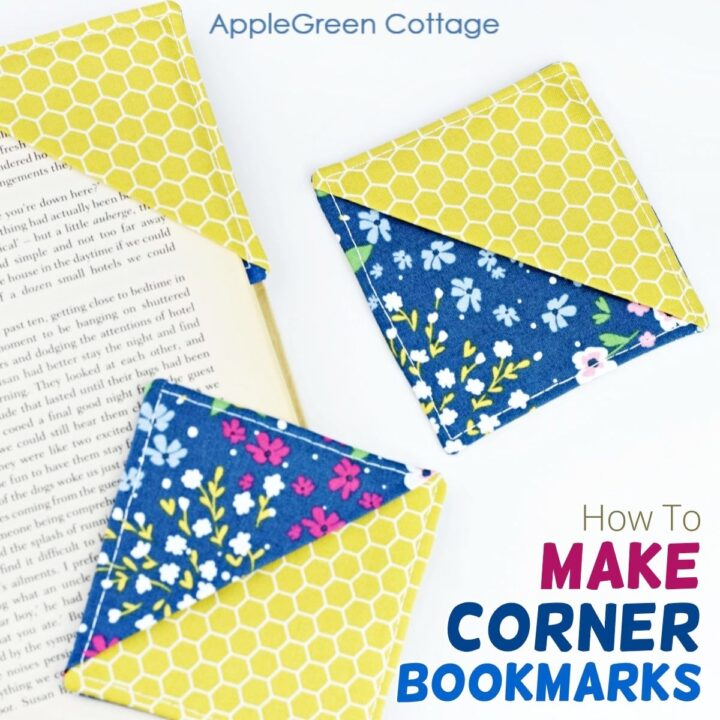
How To Make Corner Bookmarks AppleGreen Cottage
Web sew your own fabric corner bookmarks even if you are a beginner! Web cut out your corner bookmark. Web these are the stacking steps.
Place The Interfaced Square Right Side Up, Then The Triangle On Top Of It, With The Raw Side Edges Aligned.
You can also use a chopstick, scissors or a butter knife. Depending on how many pages you slip inside, these bookmarks can mark two pages at once. My bookmark pattern includes patterns for two different styles of bookmarks. Using about a 1/8 inch seam stitch all the way around the edge.
Turn Right Side Out And Press.
The first is an adorable corner bookmark. Bring both the left and right corners of the triangle to the center (at the bottom). Clip or pin the layers together. Trim close to stitching and clip corners.
Read About The Inspiration And Design Process Or Check Out The Free Pattern Below.
Bring the right side out through the opening. Take the bottom left corner, and fold it towards the top right corner. Web sew your own fabric corner bookmarks even if you are a beginner! These bookmarks are so pretty and practical yet easy to make.
Use A Turning Tool Or Chopstick To Gently Press Out The Corners.
Now place the square of fabric that you attached the interfacing to on the table, face up. Assemble and sew the bookmark. Web sew around the perimeter with a 1/4″ seam allowance leaving a 2″ opening at the bottom. Use a paper scoring tool or just fold your cardboard where the template shows you, so you end up with a square.