Bow Pattern Fabric - These cute hair accesories are the perfect way to finish off your princess outfit. Fold the long edges of the center strip towards the middle, leaving the right sides outside. With the seam side facing up, fold the ends in and insert the raw short end into the folded short end. Put your bow in the center of the strip and use the strip to wrap it around the bow. Web use a 1/4″ seam allowance. For your large rectangle, sew along 2 sides and keep the third open for turning. When you make a full circle, cut the strip’s excess fabric (if any) and fold ¼” of the end in. Web a jelly roll is a bundle of 2.5″ wide strips of precut cotton quilt fabric that helps you sew a strip quilt in almost no time. When you sew backwards by. You will need to cut just two pieces;
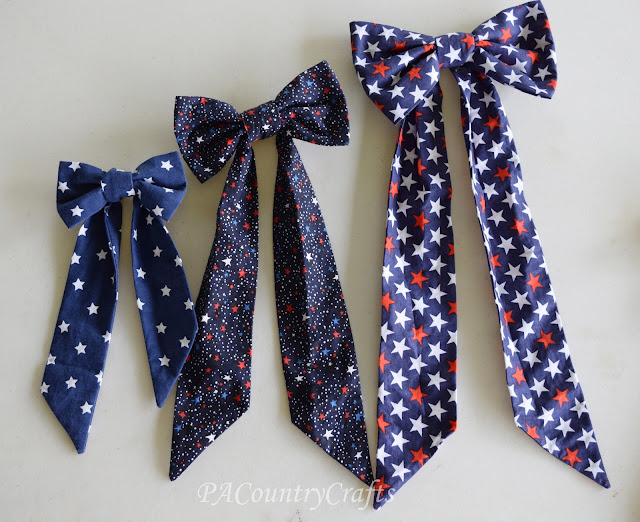
DIY Fabric Bow Pattern and Tutorial — PACountryCrafts
Solid fabric jelly rolls, sold in many colors, are also. Web large fabric bow pattern. It is easy to make and can add a designer.

DIY Fabric Bow Pattern and Tutorial Fabric bows, Fabric bow
Web tips how to make a bow that is perfect. The big rectangle will be used to make the main bow and the small square.

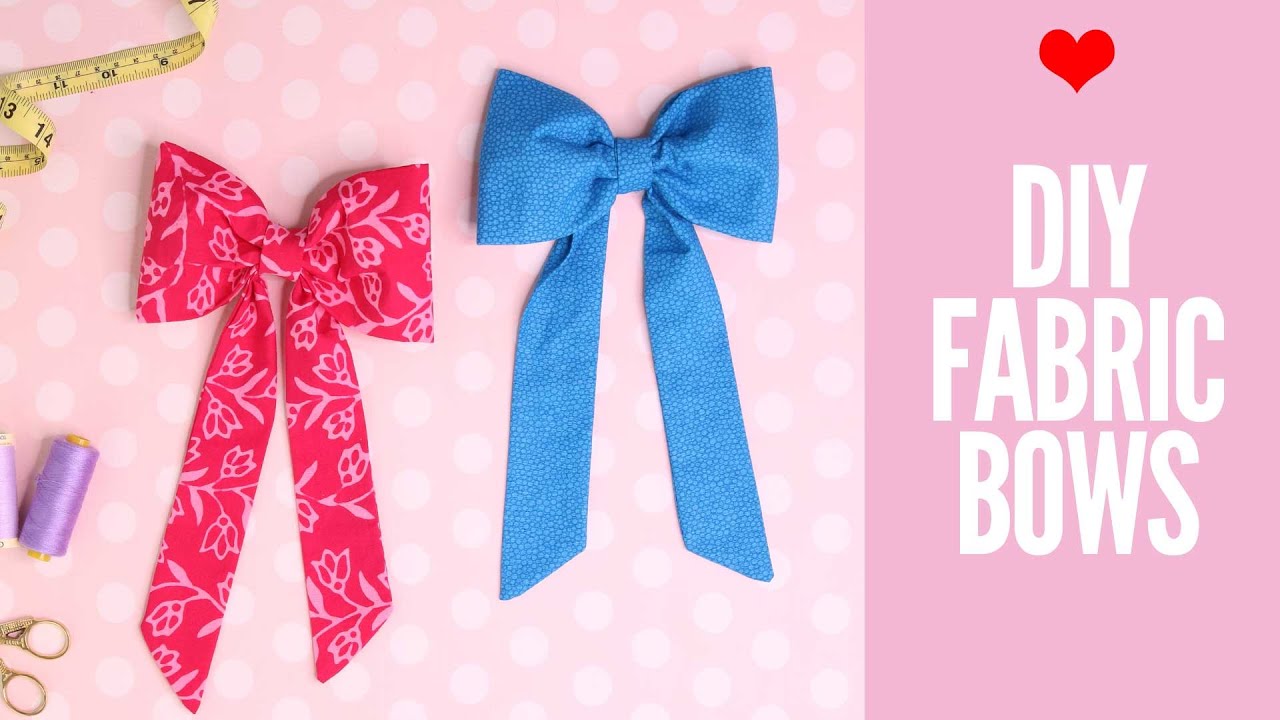
How to Make FABRIC BOWS DIY Fabric Bows TREASURIE
Cut out the following pieces: For the front, any woven fabric will do. Tie your hair with this cute tie scrunchie. Reinforce the stitch with.

How to Make FABRIC BOWS DIY Fabric Bows Fabric bows, Fabric bow
Turn this rectangle right side out.stitch the sides by top stitching or an invisible hand stitching. Using a 1/4 inch seam allowance, stitch the long.

Sewing Patterns Shop Fabric bow tutorial, Diy bow, Fabric bows
Web download the sailor hair bow pdf pattern to your desktop. To make cutting easier, cut strips 2.5″ wide and then cut down to length.

Bow Sewing Pattern Free, Fabric Bow DIY Sew Crafty Me
A rotary cutter and mat is good for. 2024 rbd block challenge | riley blake designs. Web use a 1/4″ seam allowance. For your large.
DIY Fabric Bow How to Make Fabric Bows YouTube
If you plan on making multiple different sizes, print multiple copies of the pattern. A rotary cutter and mat is good for. Here are 5.

Fabric Bow Tutorial We Made This Life
For the front, any woven fabric will do. Flip the seam to the inside center of the tube and press open. Choose your desired size.
How To Make Fabric Bows DIY Fabric Bow Tutorial ⋆ Hello Sewing
Choose your desired size and cut around the pattern pieces. Using 1/8″ seam allowance sew the folded edge closed. It will help give the bow.
How to make fabric bows tutorial I Can Sew This
Flip the fabric over, so that the seam is on the bottom (but still centered). Cut leaving no heam allowance. Web cut it out. Web.
The 2 Sides Of The Fabric With Finished Edges.these Don’t Fray.
***pattern piece to create your pattern piece, draw a shape like the one i drew, with rounded edges. If you want your girls to learn how to sew, making these little accessories are what you. It will help give the bow the cute soft shape that it has. First, we’ll make the main part of the bow.
When You Make A Full Circle, Cut The Strip’s Excess Fabric (If Any) And Fold ¼” Of The End In.
Put your bow in the center of the strip and use the strip to wrap it around the bow. Here “l” is the length and “w” is the width of the bow. For your large rectangle, sew along 2 sides and keep the third open for turning. Web this diy fabric bow is great for adding to clothing such as your favorite skirt or dress.
Web Cut It Out.
Turn this rectangle right side out.stitch the sides by top stitching or an invisible hand stitching. Using 1/8″ seam allowance sew the folded edge closed. For the front, any woven fabric will do. These cute hair accesories are the perfect way to finish off your princess outfit.
Web Turn The Bow Piece Inside Out And Press It In Such A Way That The Long Seam Is Now In The Middle Of The Bow Piece And Not The Edge.
The raw end should now be enclosed. Stitch the fabric edges together on the long side. 2024 rbd block challenge | riley blake designs. Reinforce the stitch with backstitching at the beginning and the end of the seam.